I have wanted to make a new key rack for my kitchen as the
one I had did not really match. And I
thought since it was going in the kitchen that it would be fun to use utensils
to hold the keys. Well I finally got
around to getting all the supplies for this project and recruited my little
helper to assist in putting it all together.
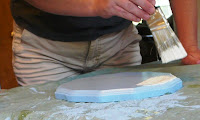
You know she wanted to do the painting part right (it is her favorite
thing)!
I have to say that if you decide to make this get your
utensils at the dollar store. They are
cheap and because of that not very thick and you can bend them easily. I know the utensils we use at the house are
MUCH harder to bend so trust me get the cheap ones!
Also we applied crackle paint to this but you don’t have
too. I just really LOVE the way it looks
and it goes so well in my kitchen. But
this could very easily be done with just one color (or two if you paint the
letters a different color).
Supplies
Base Color Paint
Crackle Glaze
Flat White Paint
Clear Protector Finish
Wood Plaque
Paint brush
Wall Hanger
Wood Letters
4 Utensils
A Strong Glue (I used Beacon 527 multi-use glue)
Directions
Start by painting your wood plaque and wood letters the base
color of your choice, then allow to dry four hours.
Apply evenly the crackle glaze to dry base color, allow to
dry one to four hours (don’t wait more than four hours!)
Apply a very even coat of your FLAT (must be a flat paint)
white paint. Do not work this layer of
paint much as it will not crackle evenly if you do. (this will start to crackle
quickly)
Once the paint is dry apply the clear protector finish to
protect the crackle and keep it from peeling off.
Allow the protector to dry then put your wall hanger
on. You want to do this before you put
on the utensils.
Next bend your utensils.
I lined mine up to make sure they were even with each other.
Now glue on your letters and utensils. And allow to dry several hours.
Then hang your new Utensil Key Rack on the wall and add your
keys!


Very cute! I love the idea for the kitchen.
ReplyDeleteFollowing you from the blog hop. I can't wait to see your other creations!
Mel S
www.twomomsalittletimeandakeyboard.blogspot.com
That is so neat!! Following you from the hop..have a great day!
ReplyDeleteThis is so cool! I wanna try!!
ReplyDeleteNew follower from the blog hop :) Check out my blog if you get a chance!
Can't wait to catch up on your posts!!
xo, Jersey Girl
hairsprayandhighheels.blogspot.com
THis look so great! Love this idea and the pics. iheartpears.blogspot.com. I'll be back soon!
ReplyDeleteHi, found your blog on Epic Mom and now following. Love crafty and DIY stuff. :)
ReplyDeleteOMG what a crafty idea! Makes my crafts look bad lol.
ReplyDeleteNew follower from blog hop :)
http://www.greatfamilyadventures.com
What a great activity!!! Coming by to visit from the Finding New Friends blog hop.
ReplyDeleteCheers,
Char
http://1epicmom.com
ahhh...so cute! Thank you for sharing at the Thursday Favorite Things blog hop xo
ReplyDeleteGreat idea! Thank you for entering in the Craftastic Competition. Good luck!
ReplyDeleteYour key rack is so creative and fun! But that little sweetie helping you is ADORABLE!!!!!
ReplyDeleteThanks for bringing this great dyi to TUTORIALS TIPS AND TIDBITS!
That's great! I love how you got your little one involved in the painting part. I have a three year old who also loves to get his hands on any project I'm working on that involves paint, lol :)
ReplyDeleteI'm stopping by from the Craftastic Competition, thank you for entering.
-Molly
www.justalittlecreativity.com
How cute is this? Thank you for linking up at the What I've Been Up to... midyear link party! What a great idea!
ReplyDeleteJulia
It's Always Ruetten