Do you all remember my friend Jill who gave us the great idea for the Headband Holder? Well the other day she asked me to come up with an idea for some book ends. Her daughter needs them and she really wanted to make some with her daughter, so she was hoping that I could come up with an idea of some to make.
I actually got pretty excited about this because I really need some for my girls too, but I never thought of making them (go figure!). So I was headed to the craft store anyway and thought I would look around and try to come up with an idea. And that is when I found the package of wood squares, I thought those would be perfect as a base but still had no idea what to put on them. Really with a simple base like this you can add anything to them to make them special, I thought about getting some animals but ended up deciding on doing the letters instead.
Since I needed to make these for both my daughters I got the letters to spell out BOOK and READ. I also let my oldest pick out how she wanted to do hers since they are going in her room and she had to make it. It was her idea to do the glitter and I think they really came out pretty cool with the glitter.
Supplies
4 Small square craft wood piece
4 Craft wood letters that spell BOOK
2 Colors of paint
2 Colors of Glitter
Mod Podge
Glue
Glue Gun
Directions
Start by painting your 2 of your wood pieces and 2 of your letters one color.
Paint the other 2 pieces of wood and the other 2 letters your second color.
Once the paint is all dry coat the letters in Mod Podge .
.
Now put your modpodge covered letters in your glitter, you can pour more glitter on top to really cover the letters in the glitter then shake off excess and allow too dry.
After the letters are dry coat them once again with Mod Podge , this will keep the glitter from coming off later (don’t be afraid to really coat it on, it dries clear).
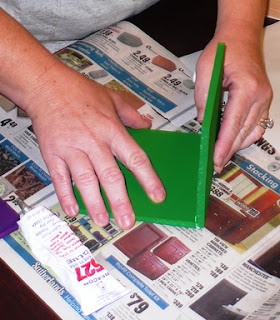
While you are waiting for the letters to dry, glue your matching color wood squares together to use as the base for your book ends.
When the letters are dry glue the two matching colors together, we glued the BO and then the OK together.
When the glue is dry, use your glue gun to glue your letters to the wood frames.
Here are the ones I made for my youngest daughter's room.


Hehehe - glitter is awesome... it gets everywhere!
ReplyDeletewhat a cute idea, and love that your kiddos got to participate in this!
ReplyDeleteThat is a fun idea. That is a great way to introduce book ends. They will be so proud to look over and see their work.
ReplyDeleteThese are so cute!! Love this idea!! Just posted on Craft Gossip...happy reading:)
ReplyDeletehttp://lessonplans.craftgossip.com/?p=6971
Oh, how fun!! I love these! Thank you for sharing at Sharing Saturday!
ReplyDeletelove these. Thank you for sharing at the Thursday favorite things hop. Big hugs!
ReplyDeleteVery cute! Love how much fun you were having and LOVE the glitter!!
ReplyDeleteThanks for sharing on Kids Get Crafty!
Maggy
This comment has been removed by the author.
ReplyDelete