

Well this crafted turned out to be more of a project than I
thought it would be. The good news for
you all is I figured out all the kinks and now it should be pretty easy for you
all to do.
I ended up having to go to the store twice to get more paint
because he had such a hard time getting the balloons to break on the canvas. First
we tried hanging it on the fence but the balloons just jumped off and broke on
the grass. So then we put it on the
ground and they still jumped off and broke on the grass. Finally I was so frustrated and complaining
to my hubs about it he made the suggestion of adding some wood to the back of
the canvas to make it harder (man I hate it when he makes things so simple and
is right). Well hubs idea worked
great. So we finally got our painting
done.
So two days and several bottles of paint (good thing they
are only $.50 at Wal-Mart) later and we have a beautiful picture for my daughter’s
room. Don’t worry though I will tell you
how to do it without going through all the trial and error we did. So you can have this one in just one
afternoon! And really my daughter did
not mind at all that we had to keep filling up and throwing more balloons. And in between all the painting we had a few
water balloon fights just for fun. So
all in all this project turned out great we had fun and learned something new
(that yes sometimes my hubs is right ;)).
Supplies
Painters Canvas
Paint (we bought the little bottles for $.50 at Wal-Mart)
Water Balloon’s
Clean Plastic Bottle (we used a soy sauce one, but I bet a
water bottle would work fine)
Plywood
Letter stickers (can leave off)
Directions

Start by pouring your
paint into your bottle. We tried a couple different ones and a Soy Sauce bottle worked best for us, but I think a water bottle would work great too we just did not try it.

Add some water to the
paint bottle and shake it up to get all the paint in your bottle. Repeat a few times.
Feel free to add a
little more water to your paint and then shake it up to mix it together. The water makes the balloons heavy and they
break easier.

Now put the Water
Balloon filler cap on your bottle. It won’t
fit perfect but that is okay it actually makes it work better. And put your
balloon on the cap.

Turn upside down and squeeze
your paint into the balloon. You will
need to squeeze hard and then hold the balloon closed with two fingers and let
the bottle fill with air and then repeat the squeezing till the balloon is
filled. Then tie your balloon closed and
set aside.

If you choose to add
the stickers to your canvas do it now.
Make sure you press them on hard.

Now put the plywood
on the back of your canvas, if you don’t have plywood you can put some heavy
books behind it too and tape them into place.


Take your canvas
outside and throw your balloons at it.
We found putting it on the ground was the easiest for my daughter. Also DON’T throw your balloons hard they will
just bounce off. They popped great when
my daughter just gently dropped them on the canvas (go figure I kept telling
her throw it hard, I was wrong)


If you added the
stickers remove them before your paint is totally dry. Otherwise they will stick to the canvas. If the paint bled through you can just touch
it up with white paint later no worries!

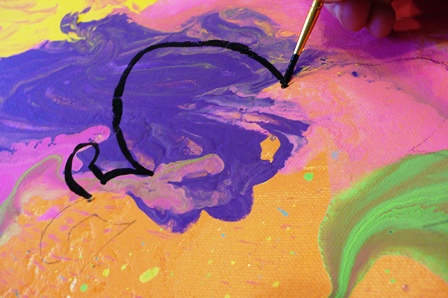
Once your paint is
totally dry you can add other pictures if you want (we did a butterfly). Just trace with a pencil then we outlined it
with black paint.

And touch up your
letters if your paint bled through.

Now you can hang your
new picture and enjoy this fun painting you and your kids made!
That looked like it was fun to make. Thanks for linking up to the All Year Round blog carnival.
ReplyDeleteWOW!! What a great idea!! Wonderful for summer boredom! Thanks!!
ReplyDeleteThis looks like loads of fun! Gonna have to give it a whirl!
ReplyDeleteThat is a great idea. I love how the finished sign for Amanda's room came out. She looks so proud holding it.
ReplyDelete: 0 ) Theresa (Capri + 3)
The other method to wrapping the balloons around a support instead of around line is that you can anchor the support to the ground for arches used outside and prevent them blowing too wildly in the wind. Consider your location first before deciding which method you want to use.
ReplyDelete